Tuesday, June 4, 2013

Hinges 3: Wrap Around Bead and more examples

A hatch door with beads with wire slipped through and bent/cut.

Beads Super Glued to the hatch. Card straps glued to one side, wrapped around the beads, and glued to other side. Straps painted.

Door frame drilled for hinge pins which are then Super Glued in place.

Hatch opens all the way.

OTHER EXAMPLES
A 1/16” thin door with wood straps. Its card hinges were tightly wrapped around the beading tool for a slightly different look when closed.

Mrs. Squeeky welcomes members of the weekly cheese tasting club. The handle is a painted Vintaj Nail Head Rivet 968933.

The only thing notable is the pins are only partly connected to the jamb. The lower parts have been cut off.

Funky hinge shapes and a sliding catch (beads/wire again, with a jump ring handle).


Weird hinge, bead/wire electricals, Hirst Arts castings, and a hasty retreat out the back door.

Sunday, May 26, 2013

Hinges 2: Fully Working Bead Type

Here are the craft beads I use. Each measures 3/16” x 1/16” with a hole that’s a bit over .032. They are made by Bead Treasures and called “Czech Glass Beads, #2 Straight Bugle Black” and come in a tube. $3.00 for a whole lot of ‘em!

In the upper right is my little beading tool. It’s a piece of .032 piano wire. I Super Glued a bead near one end and it‘s quite handy when trying to manipulate these tiny beads. Just slip one onto the end and use the wire as a handle to hold it in place. The plain end of the wire also works to pick up small dabs of glue for application and unclogging Super Glue openings as well. Multi-use!

By the way, a damp finger works well to pick these tiny guys up, especially when they decide to roam all around the work table.

Closer view of the beads. Remember, they’re only 3/16” long!

OK, time to make a hinge…
- Cut a strip of black card 1/8” wide, make a mark 1/2” from the end, bend a tab down 1/8” from the end.
- Pre-curl as shown (I wrapped it very loosely around the beading tool).

Put a bit of glue starting at the mark for 1/4” towards the end. Set a bead into the glue to keep it in place. The beading tool helps place it.

Fold the tab over the bead, trapping the bead. Then force the back edge of a craft knife up against it lock it in place tightly until the glue takes hold.

Nice and tight and all dried. Just needs dots of Super Glue to permanently hold the bead in place and it’s done. The hinge can be kept attached left to its strap or cut off. Your choice.

Here’s wire I use for the hinge pins. The one on the left is 22 gauge black annealed steel. On the right is 20 gauge copper with a bronze finish.

Parts for one barn door: The door, its straps, hinge pins, and jamb straps. I’ll be gluing the straps on, then trimming them to length.

Strap hinges have been glued to the door and dried. I then glued the jamb’s parts to it, using the beading tool to ensure alignment.

Removed the beading tool and inserted the hinge pins. Here are both doors all finished and handles added (wire and card).   Painting Tip: Acrylic paint doesn’t stick to beads or wire so I first primed with Vallejo Black Primer 73.602, an airbrush/brush on primer. It worked great!

SURPRISE! It’s Mr. Frogmonsta!

UPDATE!

I found that while I continued to work on the building I kept bumping the outer frame hinge parts, knocking them out of alignment. I added some tiny blocks of wood for reinforcement. MUCH stronger!
 

NEXT: Wrap Around and Other Examples

Saturday, May 18, 2013

Hinges 1: Card Type

There are countless ways to make hinges for doors, shutters, hatches,. whatever. Here are the methods I usually use. They may seem a bit fiddly and time consuming but they’re not really, especially when you’re making many at a time.

Be sure to check out TOOLS: Hinjig Tool. It’s a multi-tool I made while developing the hinge making posts.

INDIVIDUAL CARD HINGES FOR THICK DOORS

These are the easiest to make. For demonstration purposes I’m using a standard white index card so you can see the processes better but for “The Real Deal” I use cards that have been blackened with a marker. Begin by bending the end of the card about 5/16” from the end. Next, mark off 1/8” segments. Then cut off a 3/16” column strip with the markings off the card. Finally, cut the individual hinges. By the way, I originally tried black construction paper but found it to be a bit too thick.

The Real Deal: The thick door was made by gluing 1/16” scribed basswood back-to-back and aligning the planking. It was cut to the correct height but left a bit wide so it could be sanded to fit its jamb once the hinges were glued on. Shallow slots were carefully sanded into one door edge to minimize a gap between the door and its jamb.

Hinges glued on. Note how they stick up above the door surface. Gives a better look when the door has been installed.

The edge opposite the hinges was sanded until the door fits snugly into its jamb. Here you can see how the edge needed to be beveled so the door can close completely but still be able to close.
A craft knife was pressed into the edges for top and bottom detail.

1/8” wide card straps that were a bit overlong were glued on to both sides, then trimmed to length. Nail indications were made with a scribe (a small headless nail that’s been glued into the end of a dowel works fine. Or use a large needle). Ready for paint and handles.

- Door is all done and flipped around. The handles are Vintag JR 20 4.75 Jump Ring, attached with black 24 gauge craft wire.
- Glued into its jamb, opens inward. This is the building exterior and a balcony will be added.
- Open door from inside the building. Needs its floor.

UPSIDE: A cheap, quick and easy method.
DOWNSIDE: You only have the hinge’s surface itself to glue to the door’s edge and it’s jamb so not very strong. And card hinges are springy, not allowing the door to remain fully open.

After being opened and closed many, many times the door will wear and won’t “stick” to its jamb, popping open on its own. Easy to fix, just glue a tiny scrap of card to it or the jamb to tighten them back up.

CARD HINGE BARS FOR THICK DOORS

Similar to the previous technique but more gluing surfaces: Bend over the card… indicate where the cut outs need to be and cut them out… slice off the hinge bar.

The Real Deal:
LEFT - The door and the bar. Just need to glue the two together. Note that notches aren’t needed since the bar runs along the entire length of the door edge.
RIGHT - Hinge bar glued on and the door sanded to fit its jamb, remembering the bevel. Straps were added as well as some rivets. Ready for paint and such, then final gluing to the jamb.
(Hmmm, looks like I’ll have to have a chat with Lionel Uptuss, our Lower Hinge Strap Aligner.)

Have you ever noticed it’s never MY fault when something doesn’t get made right? That’s because I’m the boss and the one who writes this little blog. It’s good to be the king.

CARD STRAP HINGES FOR THINNER DOORS (like 1/16” basswood or mat board)

The previous ideas work fine for thicker doors but what do you do when there isn’t enough of a door edge to glue the hinges to? Hinges as part of a strap is the answer!

I bent a 1/8” wide card strap into a Z shape (1/16“ “zig“), then bent the right side down.

- I made another one, glued both to a pre-painted door and trimmed the left edges. (Flat straps were added to underside as well).
- Added nail indications and roughly painted the strap. Door is ready for install. I’ll add a handle once I decide which way the door will open and trim the hinge’s right strap ends as needed.

Obviously this method can be used for thicker doors as well.

NEXT: Fully Working.

Thursday, May 9, 2013

Hinjig Hinge Making Tool

This is a little tool I made while making hinges for buildings. I don’t doubt that the Swiss have something like it on the market but it was more fun to make my own.

MDF is 1/8” thick. On its edge its useful for measuring and cutting 1/8” card strips without having to use a ruler.

The marks along the edge are measured between each mark, not from the end. More precise for me to see.

In the right corner is a 1/4” deep band saw cut. The slot is just the right thickness for card strips. Insert card one way for a 1/8” deep bend…

and another for a 1/4” bend.

Wire bending holes are .0292 inch for the 22 gauge black annealed steel wire I use for bead hinges. Put a piece of bent wire through the hole…

Flip Hinjig over and trim the end off. And there’s nothing stopping you from putting in a straight piece of wire and cutting it off if straight pins are needed.

The 1/16” length is a bit different. The bent wire is slipped into a slot from below, then up through the hole and trimmed off.

The other side of Hinjig. A piece of 1/8” fingernail emery board was glued to the edge for sanding clearance slots.

The Z bending portion. The left part is a 1/2” square piece of 1/16” basswood with double card on its bottom that starts 3/16” from its front edge. It’s also inset a bit from the base edge. The part on the right is also basswood with double card covering its entire bottom. Double card is used so the card strip I’m using will slide into the jig easily. The slot between the two parts is a bit over one card’s thickness.
Shown: A 1/8” wide strip of card is first bent 90 degrees and slid underneath the left part. The strip is then bent down onto the right part…

Slide it out and TA DAA, a completed Z bend.

Hinjig Jr.? Small MDF bits glued together with a slot for bending two wire hinge pins at the same time to ensure the same length.

Sunday, March 17, 2013

Side Wing Odd Roof Angle

When I first started making buildings, I used the ol’ trial-and-error method to cut the roof pieces when attaching a building wing to the main building. Eventually, I added a modicum* of intelligence to my brain and figured out an easier and more precise method.
* a bit larger than a smidgen I've been told.
The problem: Just what IS that weird angle?

Since almost all of my buildings have symmetrical ends I made a couple of measurements: (A) is half the width of the end and (B) is the measurement from the wing’s peak to it’s side wall.

I then cut two overlong pieces of MDF (one for each roof piece) at the finished roof height… usually (B) plus 1/8” or so for overhang.
 From the corner on one piece I measure (A) across and (B) down and make a mark. I draw a line from this mark back to the corner and now have that mysterious angle. I cut along the line on my scroll saw (easy and accurate when using my new handy dandy Adjust-O- Matic jig), then cut its mate. Next, I sand the underside edges of the two wing roof pieces where they’ll meet the main roof for a nice, tight fit and temporarily tape them together on the underside.
 
I make the main roof, gluing the two pieces together with gussets and notching where it meets the side wing wall. I place it in place.
 I temporarily set the new wing roof in place and mark, then cut, the final lengths (as indicated by the dotted line, again remembering the overhangs).

Finally, I glue the side roof pieces to the main roof. After drying I glue some short dowels where the two roofs meet on the underside (for added strength), remove the tape and glue in a gusset near its end wall to connect the side wing pieces permanently together.

Kitty Wankus asks “What about roofs that AREN’T symmetrical?”
A: Just about as easy. Lightly mark a vertical line from the main roof peak down. (A) is then measured from that line to the edge. And if the side wing roof end isn’t symmetrical the (B) measurement will be different for each roof piece.


Sunday, March 3, 2013

Walls 3: Wattle and Daub

Good ol’ wattle and daub, CLASSIC!

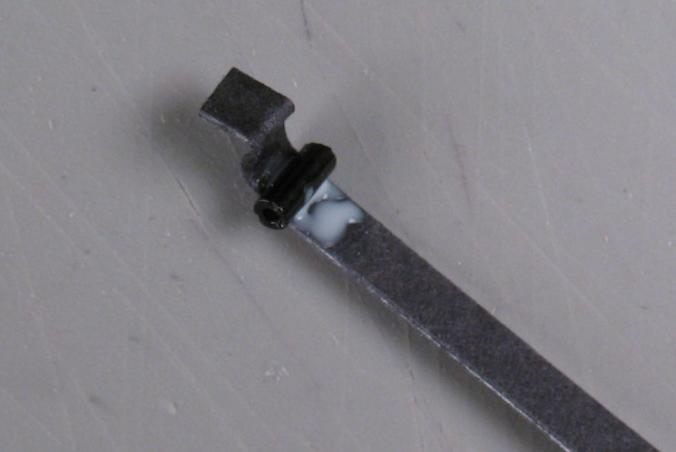
- To make a loom I first taped two small scraps of plastic to the top and bottom of the 3/4” x 1-1/2” (20mm x 45mm) hole in the end wall I‘ll be using (no photo), then glued five 3/64“ (.047) plastic rods to it. The jig to hold the loom is just two small MDF scraps with short lengths of bamboo skewers glued on. The notches serve no purpose.
- Taped the loom to the jig, tied one end of thick thread to the top of one of the skewers, wove it to the other side, looped it twice, then headed back. Back and forth and so on. Very easy to do but does take a bit of time. I ended up using four lengths of 3’ long thread in all.

UPDATE! See end for improved jig!

- The finished wattle weave. I super-glued it to the rods (BLUE) to keep it from unraveling and cut it from the frames (RED).
- Trimmed to fit the pretimbered/black primed hole in the end wall and glued into place.

The insert was painted neutral gray. My usual filler/paint mix was used to fill in all the other panels and carefully applied around the wattle. I even adding some “bits” within. Next I painted the timbers a dark brown with light gray dry-brushing. When dry I heavy dry-brushed all of the panels of the wattle an off-white, then scrubbed in some dirt along the bottom edge as well as some grass.
Interesting how the photo makes the inserts look much browner than they really are. I’ll have to have a stern talk with my photographer, Phileas Phlashpan.

The finished end wall.

The back is finished in a similar manner except I added some cracks using an Xacto blade and painted it neutral gray. I dabbed some almost dry paint here and there in the flat areas. Easy subtle texture!

Finished back.

UPDATE! IMPROVED JIG!
After using the original jig a couple of times I came up with this improvement. It has a plug-in with spacers. Now it’s even easier to make the loom…

Pop in the plug-in, tape on the scrap plastic strips, glue the rods to the strips, let dry, remove the plug-in, do the weaving. Works so well I made two frames: I can weave on a completed loom while the other is drying.